
Underwater Photography (2026): Lights & Rigs
There is a lot more to underwater photography and videography than meets the eye. Here, lights and camera rigs matter, helping you bring back colour, improve sharpness, and capture smoother footage dive after dive.
For most of us, capturing underwater images and scenes is a journey rather than a one-size-fits-all shopping trip. With today’s high-value, low-cost systems provided by action and adventure cameras, you can get surprisingly good underwater images directly out of the box, but to make these cameras shine and make your scenes pop, you must add lights and provide stability.
We look at light and why not all light is equal, choosing the right type of lighting, getting on top of costs, the limitations of systems, and why you should compromise. Here we also discuss camera rig options, how to get them right, and the importance of buoyancy and balance.
Great wall diving south of the Spanish Tower

Table of Contents
Click a topic below to jump directly to that section of the guide.
1.Not All Light Is Equal – What Matters
2.Choosing the Right Lighting System
3.Costs, Limitations & Compromise
4.Camera Rigs, Buoyancy & Balance

Live Life The Philippines - Site Hubs & Highlighted Dive Articles
Start with the three hub pages below — Living in the Philippines, Diving the Philippines, and Filipino Society — they’re the main pathways through the site. Just below, you’ll find a small set of featured dive links, including my Bohol dive itinerary, a practical guide to light and colour underwater, and a straight comparison of the best underwater camera options for diving.


Not All Light Is Equal – What Matters
Understanding light specifications matters. When you start looking for an underwater light, it’s easy to be overwhelmed by numbers and claims — every model promises more lumens, better colour, and longer burn time. The best place to start is by focusing on the three parameters that truly make a difference underwater: brightness (lumens), colour accuracy (CRI), and colour temperature (Kelvin).
These three determine how natural your footage and photos will look. The table below explains what each one means in practice and how it affects your results underwater.
| Property | What It Measures | Optimal Range | Effect Underwater |
|---|---|---|---|
| Lumens | The total light output or brightness produced by the source. | For wide-angle video, look for 5,000 lumens or more per light, ideally using two for even coverage. Spot and macro setups work well from around 3,000 lumens upward, depending on distance and beam angle. | Indicates the overall power of the light, but high lumens don’t automatically mean better results. Wide-angle video requires strong, even output to cover the full frame, while spot or macro work can use smaller, concentrated beams effectively. What matters most is balanced coverage without glare or excessive backscatter. |
| CRI (Colour Rendering Index) | A measure (0–100) of how accurately light reproduces true colours. | COB lights: aim for a CRI of 90+ for the most natural and accurate colour reproduction. Multi-emitter lights: typically range between 85–90 CRI, still producing good results but with slightly less colour depth. | Higher CRI values render colours more naturally, especially reds and yellows that water absorbs first. Lower CRI can make footage appear cooler or slightly desaturated, even when brightness is strong. |
| Colour Temperature (Kelvin) | Indicates how warm or cool the light appears, measured in Kelvin (K). | 5,000–6,500 K for natural daylight balance in tropical waters. | Daylight-balanced lights maintain natural reef colours. Warmer tones (below 5,000 K) enrich coral and sand; cooler tones (above 6,500 K) enhance blue-water clarity but can look clinical if overdone. |
LED Types Used in Underwater Lights
When you start reviewing underwater lights, you’ll notice different LED designs used across models. Each affects how the beam spreads and how evenly it lights your subject. Most lights use either a COB or a multi-emitter array — understanding the difference helps you choose the one that fits the kind of diving and shooting you do.
| LED Type | Description | Best Use | Typical Effect Underwater |
|---|---|---|---|
| COB (Chip-on-Board) | A single large emitter combining many small diodes on one substrate, producing a smooth and uniform light source. Often used in high-end video lights for consistent colour and soft diffusion. | Ideal for wide-angle video or general scene lighting where even illumination and colour balance are important. | Creates soft, shadow-free light with smooth falloff and even colour — excellent for reef scenes and natural-looking footage. |
| Array / Multi-Emitter LED | Several smaller LEDs grouped together, often with individual lenses or reflectors to boost intensity and beam control. | Suited for macro, spotlighting, or mixed-lighting setups where beam control and punch are more important than softness. | Delivers a tighter, more focused beam with higher peak brightness — effective in low-visibility or when highlighting specific subjects, but can produce harsher edges if used too close. |
Setting the Stage
These light designs and parameters are a starting point for choosing the right setup. Underwater lighting systems can become eye-wateringly expensive, but that doesn’t mean effective lighting is out of reach. With a bit of research and a few compromises on top-end specifications, a very capable and reliable setup is more than achievable.
Choosing the Right Lighting System
To be fully effective, the lights you choose need to align with your camera’s capabilities — primarily its field of view (FOV), minimum focus distance, and lens type (fixed or zoom). For videography, I use a DJI Osmo Action 5 with a fixed lens, a standard 120° FOV, and a minimum focus distance of about 400 mm. It’s set up for expansive, wide shots rather than macro, and works best when paired with lights that produce a broad, even beam that fills the frame. Unfortunately, with cameras there’s no true one-size-fits-all setup. There is some middle ground — for example, with the Olympus TG-7 — but even here, in its standard format, maximum FOV options are limited.
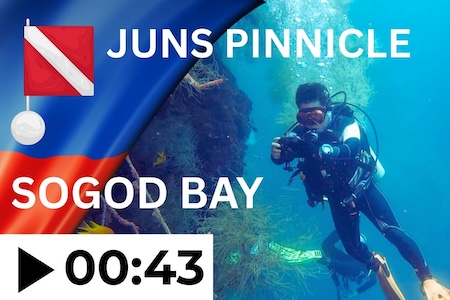
This small rock pinnicle rises up from 40m and offers spectacular wall diving and a table top coral reef.
So where does this leave us? In most cases, I meet recreational divers who either enjoy macro photography or prefer wide reef videography. To illustrate how lighting can be arranged for each style — while keeping cost and practicality in mind — let’s look at two popular examples: the DJI Osmo Action 5 and the Olympus TG-7, and how they can be set up with simple, effective lighting configurations.
| Camera | Typical Shooting Style | Field of View (FOV) | Minimum Focus Distance | Lens Type | Recommended Light Setup |
|---|---|---|---|---|---|
| DJI Osmo Action 5 | Wide-angle reef videography, scenic shots, divers in frame | ≈120° (fixed wide) | ≈400 mm | Fixed lens | Two wide-beam COB video lights (beam angle 120° or greater, ≥ 5,000 lumens each, 90+ CRI) for full-frame, even illumination and natural colour. |
| Olympus TG-7 | Macro photography, close-focus reef and subject detail | ≈70° (at widest, narrows underwater due to refraction) | 10 cm (standard) / 1 cm (macro mode) | Zoom lens (25–100 mm equiv.) | One focused multi-emitter LED light (beam angle 60–90°, 3,000–5,000 lumens, 85–90 CRI) for accurate, controlled lighting at short range. |
Costs, Limitations & Compromise
All underwater lighting systems have limitations. Cost is the first — can you afford it? Specification limits follow: brightness, beam spread, and colour accuracy only go so far before heat, size, or battery life become constraints. Every light also affects the marine environment, from glare to disturbance, and finally there’s manageability — how easily it can be handled, positioned, and maintained in real dive conditions.
I currently dive with two 120° beam, 5,000 lm COB video lights paired with my DJI Osmo Action 5. Were they expensive? To me, yes — but they sat in the mid-range, offering reasonable manufacturing assurances, good CRI, enough light output, and a colour temperature that worked with my setup.
Great wall diving south of the Spanish Tower
So did I compromise and what limitations have I found.
Each of these factors affects how a lighting system performs in real-world diving. Here’s how those trade-offs play out in practice:
Beam Effectiveness –
5000 lm wide-angle lights only provide illumination within 1–1.5 m of the subject; any farther out, brightness and colour drop off quickly. Moving up to higher-capacity systems provides some benefit, but it’s marginal and comes at much greater cost. Over time I’ve experimented and learnt to work within the capabilities of my current lighting setup, refining positioning, frame backdrops, and angles to get consistently strong results. With thoughtful composition and control of light balance, even mid-range video lights can capture vivid, well-exposed footage that feels natural and true to the scene.
Battery and Weight –
Lumen output directly affects both battery demands and handling underwater. A 5000 lm light typically runs 20–30 minutes at full power and remains compact enough for easy rig balance. Stepping up to 10 000 lm adds bulk, larger cells, and relatively short burn time — often under 40 minutes at maximum output. By being selective with when I use my lights, I can comfortably stretch my setup across two dives, saving battery while still capturing strong, well-lit footage when it counts. I keep my own setup neutrally buoyant with simple float arms, which works well at this level, but larger systems become noticeably harder to trim and manage.
This small rock pinnicle rises up from 40m and offers spectacular wall diving and a table top coral reef.
Manufacturing and Build –
The quality of construction plays a major role in reliability and performance underwater. High-end systems are typically engineered to tighter tolerances, with careful attention to heat management and water sealing. I’ve learned that failing to maintain equipment after each dive can be costly — power buttons can seize with salt, and O-rings can develop micro-cracks that lead to water damage. High-end, low-end, or anywhere in between, post-dive maintenance is essential: soak everything in fresh water, clean the seals, and re-grease before the next dive. I might be slightly less stressed — and certainly richer — if I just listened to myself once in a while.
Light Impact in the Marine Environment –
Using light in underwater videography has its place, and I certainly don’t use mine just because I’m filming. You quickly learn that opportunities can disappear fast when you flick the switch at the wrong time or in the wrong environment. Pelagic fish, such as jacks or barracuda, often spook at the sight of a light, so it’s best to make use of the natural light available and let the camera do its job. Turtles are surprisingly tolerant — especially hawksbills — and of course, the ever-friendly anemone fish always turn out for a show. That’s part of the attraction of underwater videography and photography: there’s always more to it than just footage and photos.
Camera Rigs, Buoyancy & Balance
On a recent dive trip to Balicasag Island, one of my dive partners — on seeing my camera rig, which sometimes looks worse for wear and has its fair share of electrical tape holding things in place — asked me, “Did you make that yourself?” My answer, proudly, was yes.
As soon as you start adding to your setup, you’ll need a camera rig — and a well-balanced, neutrally buoyant system will make a big difference, not only to your photo and video results but also to your overall dives.
Companies such as SeaLife offer all-in-one solutions when you buy into their products. While these systems can deliver good overall results, my view is that buying into a closed range often leads to further costs down the road — especially when you want to upgrade your camera or need more adaptability.
The Basics Components Is All You Need –
Most of us, during our dives, have seen, what appears to be complicated rig setups with ball clamps, arms, floats, camera connection points, and lights — but in principle, they’re all made up of the same set of simple aftermarket components. You just need to know what you want to achieve and work through to a simple solution.

Camera Tray – These dual-handled trays are tall enough to accommodate most camera housings, adjustable in width, and have ball mounts on top of each handle to connect clamps and extension arms.

Rig Extension Arms – Available in a wide range of lengths, these arms can have dual ball connections or a combination of ball and flat plate fittings depending on the setup required.

Ball Clamps – These connecting clamps are typically available in two- or three-way configurations, allowing flexible positioning of arms and lights.

Float Systems – My personal preference is foam floats. They don’t provide as much lift as air-filled types, but they’re low-maintenance, relatively inexpensive, rugged, and designed to integrate easily with rig extension arms. Getting your rig’s buoyancy somewhere close to neutral makes a big difference, so it’s worth taking the time to get it right. I often see divers carrying heavy rigs with no floats at all — that extra weight throws off their buoyancy and makes it harder to hold a steady shot. A well-balanced rig, by contrast, feels almost weightless underwater and lets you focus on composition and timing.
Buying on a Budget –
All of my camera rig equipment is bought online. Living in the Philippines, I’m fortunate to have direct access to the Chinese market through platforms such as Shopee. My tray, for example, was purchased from a company called Feichao, which offers a wide range of aftermarket products. Feichao also provides branding options for large orders, which is why you’ll often see their products re-badged, re-priced, and sold by specialists worldwide. If you’re looking to purchase a camera rig, spend a little time browsing and comparing online — you can’t go far wrong, and a bit of research can save you a lot of money.
Live Life The Philippines - Featured Articles
Explore our featured articles that cover the most important topics for life in the Philippines — from visas and healthcare to real costs and everyday essentials.


Frequently Asked Questions
What are the most important specifications to consider in an underwater video light?
The three key factors are lumens (brightness), CRI (colour accuracy), and colour temperature (Kelvin). For natural underwater colour and even illumination, aim for 5,000 lm or more per light, a CRI of 90 +, and a daylight balance between 5,000 K and 6,500 K.
What is the difference between COB and multi-emitter underwater lights?
COB (Chip-on-Board) lights produce a smooth, soft beam ideal for wide-angle video and reef scenes. Multi-emitter lights use several smaller LEDs for a tighter, more focused beam, making them better suited to macro work or low-visibility conditions.
How bright should underwater video lights be for wide-angle versus macro filming?
For wide-angle videography, use two COB lights rated between 5,000 and 10,000 lumens each for full-frame coverage. For macro or close-up work, 3,000 to 5,000 lumens is usually sufficient. Beam spread and positioning matter more than sheer brightness.
Why is buoyancy important in an underwater camera rig?
A neutrally buoyant rig feels weightless underwater, improving stability and reducing diver fatigue. Heavy rigs without floats pull downward, affecting both trim and shot control. Adding foam or sealed float arms balances the system and keeps footage steady.
What are the basic components of an underwater camera rig?
Most rigs are built from five simple parts: a camera tray, dual handles, extension arms, ball clamps, and float systems. These modular pieces let divers position lights precisely and fine-tune balance for video or photography.
How can I choose an affordable underwater lighting setup?
Identify your shooting style first — wide reef scenes or close-focus macro — and match your lights to your camera’s field of view. Mid-range COB video lights with high CRI and good build quality offer an ideal balance of cost and performance.
© 2025 Live Life The Philippines. All rights reserved.
Back to Top